
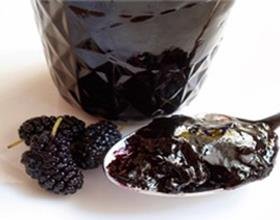
Early data on mulberry documents that they originate from China. The mulberry tree is cultivated from wild trees, with the desire to create silk from silkworms. Silk worms thrive on the leaves of the mulberry tree. The more leaves they eat, the more silk they produce.
Mulberries are available for a short time during mid-summer.
Although they contain some seeds, mulberries have a melting quality in the mouth. They cook extremely quickly and therefore should be eaten almost immediately, unless dried, boiled, or frozen. Mulberries are often used in ice cream, fruit juice ice cream, jam, molasses, drinks, and especially pies.
How to prepare black mulberry jam (dudita)
Do you have a mulberry tree in your yard that produces a large number of mulberries every year and you don't know what to do with them? Harvesting and preserving them with mulberry jam is quite easy.
Below are the steps on how to do it in simple steps
Ingredients and Equipment
- At least 1 large pot, 30 l Teflon containers (easy to clean)
- Large (wooden) spoons
- A large pot in which the jars will be pasteurized after filling (or a pasteurizer).
- Jars (8 jars, 720ml)
- Fruits - fresh mulberries (6 kg of mulberries)
- Sugar (4 kg)
- Lemon balm (10 g)
- Jar clamp (to catch hot jars)
- Core removal devices
Step 1: Choose the mulberries
It is best to harvest them directly from the tree and make them of the highest quality. Frozen quinas can also be used if you find them (without added sugar), which is especially useful if you want to make jam in December!
How much fruit?
For making mulberry jam, it is better to use smaller amounts so that the fruit does not fall apart. It is easier and faster to distribute the heat if we have fewer fruits. This recipe describes the jam with 6 kg of black mulberries.
Step 2 – Clean the jars and lids
Now it is better to get ready-made jars so you won't have to rush later. Pasteurizing jars takes up to 10 minutes, and jars can be kept in hot water until they are used.
Keeping them hot will prevent jars from breaking when filled with hot jam.
Step 3 - Wash the fruits to remove dirt!
Clean the fruits under running water and remove unnecessary parts such as leaves, debris, and others.
Caution: berries will stain easily.
Step 4 – Boil the berries (depending on the amount of berries)
Heat the berries in a covered pot. This helps the fruit release juices and seeds. After the fruit juice evaporates, sugar is added
Step 5 - Coagulation (thickness) testing
Keep a metal spoon placed in a glass of ice water, then take half a spoon of the mixture and let it cool in a spoon at room temperature. If it thickens to the consistency you like, then the process is complete and the jam is ready.
Step 6 - Fill the containers and put the lid on
Fill them to the top, and close the lid. Then place them in the pasteurization container! The yield of this recipe is 8 jars (720ml). Step 7 - Remove the jars from the pasteurizer and let them cool gradually
Remove the jars from the water using the lifting mechanism of your jar jar and let them cool gradually in a cool place (usually overnight). Once the jars have cooled, you can check that they are sealed.
Just press in the center, lightly with your finger. If it goes down (often making a sound), it is not sealed. If you put the jar in the fridge immediately, you can still use it.
Once cooled, they are ready to store it. Using this jam can last up to 12 months. But after 6 to 8 months, they turn dark and start to become juicier. They are still safe to eat, but the taste and quality are not as good.
Another option is to keep berries or other fruits frozen and process them when necessary.
Available in: SHQ, ENG, SRB